Welcome to recipes and stories from an unorganized but tasty self taught home cook/movie junkie.

Saturday, February 26, 2011

Mom's Stuffed Mushrooms

My Mom always made Stuffed Mushrooms for Christmas Eve and for other gatherings. She was known for them. Everyone always raved about them. I never touched them because...well...Mushrooms. Eww. Gross.

Then, one year, after having my second child, I decided I needed to throw Mom a surprise party for her birthday. Now, when I throw a party, I NEED to have a theme. Seriously. I LOVE doing a big themed party with the decorations and the food and the party favors and the music all somehow tied together.

And since my Mom was so proud of her Italian heritage, I decided what better theme than an all out Italiano party.

It was great. I decorated with grapes, red, white, and green. I bought cheeses and grapes and wines to start the party off. I bought CD's that were called something along the lines of "Mob Hits Volumes 1 and 2". Little Italian Flags everywhere. When she walked in, I made sure the theme to "The Godfather" was playing in the background.

And, of course, you can't have an Italian Party without good, ole' home cooked Italian Food. Big Food. LOTS of food.

I was new to the whole cooking thing, but I did it. I made Brasciole and Sausage and Peppers. I rolled a couple of hundred meatballs. I did two different pastas. I did Chicken Marsala. And...I decided to try and make Mom's Stuffed Mushrooms.

I not only succeeded in making her Stuffed Mushrooms. But her Very Best Friend actually commented to her "Sorry....but I do believe these are even better than yours. If that's possible." And they laughed. A lot. Because that is what they always did when they were together.

And I beamed. For something that I can't eat, I seemed to have done a good job at making them. And the Stuffed Mushroom torch was handed over to me.

My Mom is gone now. And so is her Very Best Friend. But, the friendship of these two great women continues into the next generation. And whenever we are together where there is going to be good food, good laughs, and good cooking....I usually make the mushrooms with fond memories and I can hear them laughing somewhere in the distance.

Like last weekend. My Girls' Weekend Away was with my Very Best Friend....who is the daughter of my Mom's Very Best Friend. And we laughed. A lot. Just like the two great women before us. And we made Mom's Stuffed Mushrooms.

Here is her recipe. I make it the same way Mom did. And there are no measurements. It's very old school Italian style of cooking. You know: A dash here, a pinch there.

You take your very ordinary white mushrooms and clean them. Then carefully remove the stems from the caps and separate them.

In a pan, melt one stick of butter and a drizzle of Olive Oil.


Add an onion that's been chopped to death and stir it into the hot melted butter and Olive Oil.

Then add minced garlic. I guess about two or three cloves.

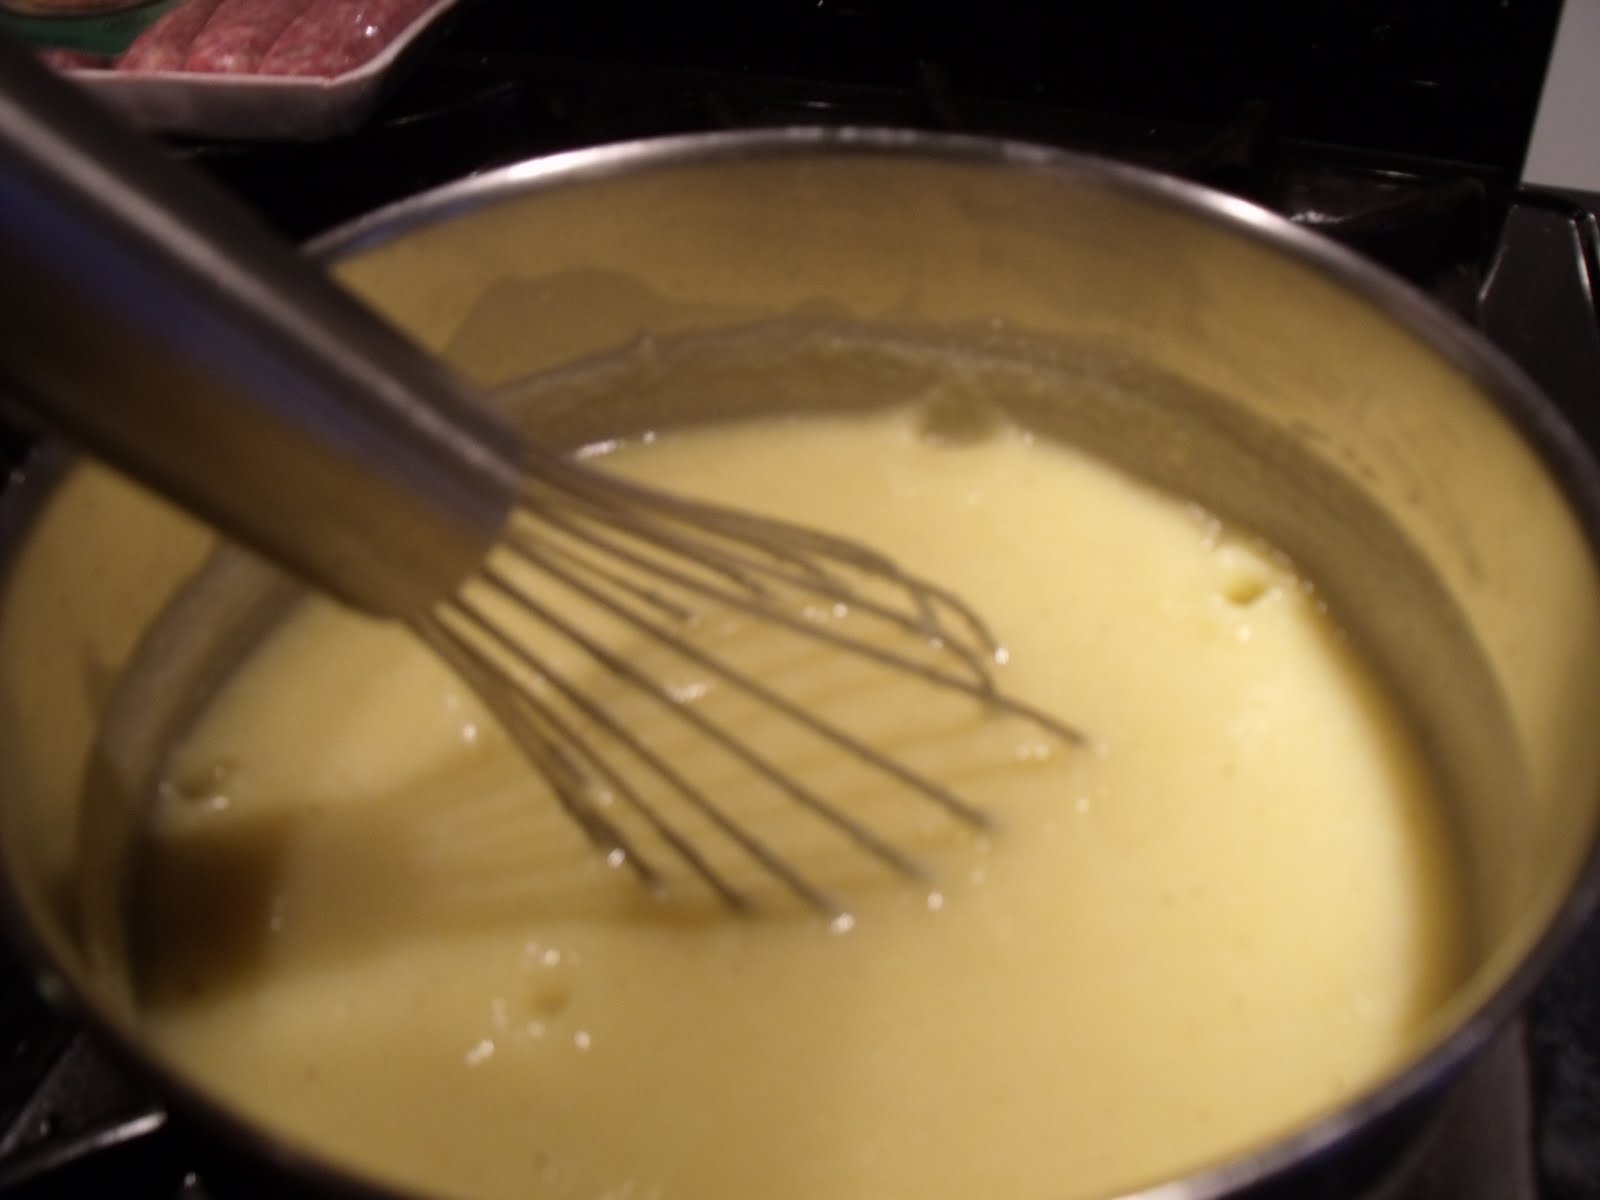
Let it heat and cook through. While it's cooking, take those mushroom stems and chop it up until it is almost pureed. Throw that in the pan and mix. It should be liquidity. If not, add some more butter.


Now, here's the funny thing. For someone who doesn't like mushrooms, I love the smell of the mushrooms and onions and garlic and butter. It's one of the smells that brings back so many memories. If I close my eyes, I am twelve years old again on Christmas Eve. I can feel my Mom bustling about. The smell just screams Holidays to me.

Give the mixture a mix. Let it cook. Mix some more. If it looks to "dry" add some more butter.

After about ten minutes, throw in a handful or two of Italian Breadcrumbs and mix it in good. Now it should be the consistency of a thick paste. If it's too dry, add butter. Too wet, add more breadcrumbs.


Top this off with a good handful of Grated Parmesan Cheese. And mix it well. Turn off the heat. No need to add salt, because the butter and the Cheese is salty enough.


Take a baking pan and GENEROUSLY grease it with butter. I'm thinking the butter is the key in this recipe.

Then, with a teaspoon, begin to stuff your mushroom caps with the mixture from the pan. Make it nice and neat and smooth. Don't over do the stuffing because then you will end up with empty caps. You want to make sure you have enough stuffing for every cap.


Bake for about 20-25 minutes.


And you're done.

This is a GREAT make ahead recipe. You can do it the night before, let it cool, cover...then reheat the next day in time for the party. This is also a great vegetarian option for appetizers. And people absolutely rave about them. I can never make enough.

So, make these and share them with some good friends. Good Music. Good Wine. And a whole lot of Good Laughs. Because that is how they are meant to be eaten.

Thursday, February 24, 2011

A Preview

It's been a busy week. The kids are off from school. We have overnight guests that are kids themselves. Took a field trip. And I'm still recovering from Girls' Weekend away.

As always, with Girls' Weekend Away, there is a whole lot of this:


And a whole lot of good food to go with it. Here's a preview of recipes that will be coming up in the next few days. So....stayed tuned because The Movie Junkie Cooks will be back with awesome finger foods for ladies, men, and everyone in between. They are real pleasers. Appetizers that are pleasers. Hmmmm....I think I'm on to something here. I think I'll call them "Appepleasers". Or spell it all funky like "Appepleazers". I like throwing a "z" in words. I don't know why.

AnywayZ.....

Mom's Stuffed Mushrooms:
Crab Salad in Won Tons:
Little Dogs Wrapped in Bacon:
Hawaiian Meatballs:
Grandma's Sausage Bread:

Monday, February 21, 2011

The Delicious Imagination of a Child

Over the weekend I had a very much needed Girl's Weekend Away. The first night consisted of a delicious dinner out with my oldest, nearest, and dearest friend and then back to her house where we drank, laughed, and cooked different items for us to serve on the second night.

We'll get to the food we made and the second night another day. For now, I want to introduce you to this:


I did not make it. Her son did. He's "tween" aged. He's a growing boy. He was hungry. So, he broke out the little Snack Pack of Vanilla Pudding, a Bag of Pretzels, and a Jar of Peanut Butter. And he created this:


As Mothers, my friend and I looked at him with eyebrows raised. He looked at us back with that mischievous grin that all young men seem to get and said "What? It's good!"

Then he offered us a tasting.


And it was good. It was more than good. It was really good. Who knew that a tiny pretzel sandwich with peanut butter and vanilla pudding would be so good.

So, the next time you're hungry for a snack but nothing is really jumping out at you.... You have a craving, but you don't know what you are craving.... Pretend you are eleven years old and play in the kitchen. The kitchen is meant to be a creative space. Don't be afraid. The worse that can happen is you spit it out and never mix that combo together again.

And if you are really stumped.....go for the pretzel/pudding/peanut butter sandwich. It really is that good.

Wednesday, February 16, 2011

Valentine Jell-O Cake

First off, I have to tell you a little secret. I cannot bake. I'm not that good at it. There are a couple of things I can do...I make an amazing Chocolate Chip Cookie which is a secret recipe of mine and you'll never ever ever EVER get it out of me. I can make a pretty mean cheese cake. And I make these little things I like to call Drunken Zebra Cakes....I'll have to make them one day and share that one with you.

But other than that, I really don't do dessert well. It's too constricting. You have to have exact ingredients and exact measurements. No room to play with it or leave an ingredient out because baking is more like a science. Cooking is more of an art. I think. But baking becomes an art too. I have this friend who is always posting pictures of cakes and cupcakes that she has made and they are so beautiful!! I'm green with envy because I do not have the patience or the steady hand to craft the awesome cakes she does. I wouldn't be surprised to see her on one of the Cake Design Competition Shows one day.

Anyway...here is a cake that the Movie Junkie did for Valentine's Day. Let me tell you a bit about it. It was Valentine's Day and since I'm trying to watch what I eat and lose weight, I decided to dig into my recipe draw for an old recipe that I had made when I was losing weight years ago. It was for a low-fat cake and I remember being so surprised at how good it came out....despite the really odd ingredient.

It's a Jell-O Poke Cake. And it's so simple. So easy. But so not fancy. But the taste will surprise you!

You take a box of any white or yellow cake mix.


To the cake mix you are going to add 1 and 1/4 of your favorite diet Lemon-Lime Soda.


WHAAAAAAT??? Yes....Diet Lemon-Lime Soda.


Also add two egg whites.


Mix it all together. It's gonna look weird because of the fizziness from the soda, but it will eventually blend all together and look just like normal cake batter.

Pour the mixture into a sprayed pan and pop in the oven according to directions on the cake box. Keep and eye on it though. I found that my cake baked about 5 minutes quicker than what was on the box.

When you take it out, gently poke a bunch of holes in the cake with a fork.


Then, heat up 1 cup of water to boiling. Add in one small package of Sugar Free Jell-O and mix until dissolved. Since it was Valentine's Day, I went with Cherry. Raspberry is also tasty. I have a feeling Lemon would be really good too. I think I'm going to try that for Easter.


Ladle the Jell-O mixture all over the holes in the cake. Then put the cake in the fridge to set.


Just before serving, I put some of this fluffy goodness:


Mmmmmm!!! Cool Whip. Fat Free Cool Whip!!! I iced the entire top of the cake with it.

Slice and......


Isn't it pretty? I mean, I know it isn't Cake Boss pretty, but it's still pretty impressive when you cut out a piece. And it tasted really good.

My husband was on his second piece before I told him it was "diet". My kids had two pieces each. No one knew any better. They just really liked it. But the best part was, that on Valentine's Day, this weight watching Mom was able to have her cake.....and eat it too.

Monday, February 14, 2011

Coq Au Vin

The other day, my husband and I exchanged the following text "conversation":

Me: Looking forward to trying something new tonight with dinner!

Him: Great! Can't wait.

Me: Well, I'm insulted. Aren't you even gonna ask me what I'm making? ; p

Him: Oh. Ok. What are you making?

Me: Coq Au Vin!!!!

Him: Did you just curse me out?


Yes, people. You say it pretty much as you read it. Coq Au Vin. I guess the whole "Coq" part kind of threw him off. I like to say it with a snooty, fake, horrible French accent. (Not that the French have a horrible accent. Just that I do a horrible accent.) And it is a classic French dish. It means...Cock with wine. Now that all of you got your minds in the gutter, you should be ASHAMED of yourselves!!! We are talking about fine, classic, French cuisine!!!

To get your dirty minds out of the gutter, let's call it Rooster with Wine. Or Chicken with Wine. Which is what it is. A delicious, succulent, amazing dish of Chicken, veggies, other wonderful ingredients, all simmered in an amazing Red Wine Sauce.

Now, I have to warn you. This is a dish that takes time and little bit of effort to make. It took me a lot longer to get to the simmering part then I thought. There was more work to it than I had thought. But, if you take your time....enjoy your time....you will be rewarded with an amazing dish that tastes like it just came from some fancy, froo-froo restaurant. And your kitchen will be thick with the smells of a professional chef. I couldn't believe how awesome my kitchen smelled. And each step just created another layer to the aroma. Each step creates another layer to the flavors of the Coq Au Vin.

The other thing I have to warn you about are the pictures that I took. I am aware that my pictures are not the greatest to begin with (This is the Movie Junkie Cooks, not the Movie Junkie Takes Awesome Photographs!), but my camera had died and I used my husband's camera, which I'm not used to. Plus, I was kind of a bit frazzled making this dish and felt rush in taking the pictures between the different steps. So, please forgive me.

Ok. Enough Chit-Chat. On to COQ AU VIN!!!!

First do your prep work. That would include:

Three Carrots, peeled and chopped. (next time I'm buying the baby carrots and just cutting them in half. It'll save me time).


Two or Three Celery, (celeries? celerea?), washed and chopped.


A good couple of handfuls of Pearl Onions, tops and bottoms cut off, and skin removed. (next time I'm buying frozen ones. Too much work here.)


A package of Mushrooms, cleaned and quartered. (again...next time....just buying sliced mushrooms already cleaned.)


About four strips of Bacon, sliced into pieces.


Now....let's begin. In a large pot, cook up the Bacon until crisp. Remove with a slotted spoon (and HIDE IT because otherwise you will be snacking on it and then there will be no more left for later on when you need it! Not that I did this.)


Leave the bacon grease in the pot and add about a Tablespoon of Olive Oil. Then throw in the Carrots/Celery/Pearl Onions. Toss to coat with the Bacon fat and Olive Oil. Let cook, occasionally stirring, for about 20 minutes.


Remove and place in a bowl. Add another Tablespoon or two of Olive Oil to the pot, then throw in the Mushrooms and some minced garlic. Stir and let it cook down. About 5 minutes. Remove to the same bowl the other veggies are waiting in.


In same pot, you are going to add a little more Olive Oil. Salt and Pepper your chicken pieces. (I bought my chicken cut up for me. At least I was smart about that and didn't waste more time trying to butcher the darn thing.) You should have eight pieces: 2 legs, 2 wings, 2 breasts, 2 thighs.

In batches, place the chicken in the pot and let it brown on both sides. You're not looking to fully cook them. You just want to get the skin nice and golden. Remove the chicken pieces to a separate bowl from the veggies.


Add another Tablespoon of Olive Oil (last one, I promise), then a small can of Tomato Paste. Stir it in as good as you can. Try and get up any of those tasty bits at the bottom of the pot. The paste will turn dark, maybe stick. That's okay.


Zest an Orange right over the pot and into the tomato paste. I love the smell of citrus cooking.


Then, carefully (because it's FLAMMABLE!!!) add a nice splash of Brandy and stir it into the tomato sauce. It's starting to really smell professional in your kitchen....I mean if you didn't set anything on fire with the Brandy. And if you did...well, I warned ya. How big of a splash of Brandy? About one turn of the pan should do it.

Let it cook and mix with the tomato paste and the orange zest for just a couple of minutes. Just enough to let the flavors join together.

Now, place the chicken pieces back in the pot. Add the veggies. Take a bottle of Red Wine and pour around the pan. About two turns of the pan. Then add a can of Chicken Broth/Stock. Tuck in a couple of Bay Leaves in there. Sprinkle with some Dried Thyme, Salt, Pepper. With a spoon, carefully try and mix the veggies around the chicken, over the chicken, under the chicken. Very, very carefully because this pot is going to be CROWDED with all that good stuff.


Place a lid on it, and let it simmer on low heat until the Chicken runs clear juice when poked or a thermometer in the Chicken Breasts reads 170 degrees. This took me about an hour or so.

While I waited, I decided I needed to do something with the Zested Orange, the open bottle of Red Wine, and the Brandy that I paid way too much for. And I did. Grabbed some Seltzer, sliced the orange up, put the slices in a pitcher and muddled it with some brandy. Then added the rest of the bottle of Red Wine. Topped it with Seltzer and Viola!!!! Sangria!!!! YUM!!!

Back to the Coq Au Vin. When done, remove Chicken and Veggies with slotted spoon. Over medium heat, add about two Tablespoons of Flour that was whisked with three Tablespoons of cold water. Keep whisking that flour mixture in that sauce as it bubbles and becomes thick. Then turn off heat and spoon sauce all over the Chicken and veggies.


I really wish you could have tasted it. It truly was divine. OH! Before I forget, just when you are about to serve it....the Bacon pieces? IF there is any left....garnish the dish with that.


My kids LOVED it. The chicken was moist and juicy. The Red Wine Sauce was AMAZING. My husband couldn't get enough of it.


Yes. It took a lot of time and work. But it was so worth it. Every single bite was simply....amazing. It has such a comforting, warm way about it. But the Orange Zest, the Brandy, and the Red Wine really takes it up to a "fancy" level.

Sunday, February 13, 2011

Sausage and Peppers Over Grilled Polenta

For those of you who were watching America's Worse Cooks, I swear I did not copy this from last week's episode. It was already on my menu plan. When I saw that they had to make something similar, I laughed. I guess great minds think alike.

Sausage and Peppers over Grilled Polenta is great. If you have never made polenta, don't shy away. If you really are not comfortable, you can buy Polenta pre-made and just slice it and grill it. No biggie.

I love Polenta. It's a bit bland, but creamy. Almost like grits. I also love grits. Well, I'm a Northern Girl, so I don't get grits often. But I do get them every time I go to The Cracker Barrel...which isn't often because the nearest Cracker Barrel is like an hour and a half away. I love the Cracker Barrel. I love it so much that I have been known to plan vacations around The Cracker Barrel, just so we can eat there on the way to and from our destination. Shhhh....don't tell my husband.

Now, on to the dish. It's really simple.

First, you start with a cup of Cornmeal.


Whisk it into a pot of one cup of salted water.


When it's all mixed in, turn on the heat and add 2 cups of boiling water.


Whisk, whisk, and whisk some more and it will get thick, thick, thick. Once it resembles apple sauce or your arm resembles Arnold Schwarzenegger's arm, it's done. It should be real thick. Turn off the heat.


Pour the Polenta in a lined pan. I used a square Pyrex and lined it with parchment paper. You can use wax or plastic wrap. But I hate plastic wrap. I end up with it and then eventually throwing the whole box across the room. Plastic wrap and I do NOT get along. It's evil, I tell ya!


Anyway, smooth out the polenta, make it all even. As if you were doing a cake batter. Then pop in the fridge for about an hour. This is a great "take a break" meal. Do one half of the meal, then go sit down....watch Judge Judy....or Oprah...or run an errand....then go back to cooking.

Now it's time for the Sausage and Peppers part. First the Sausage.


You need good Italian Sausage. Whether you use Sweet or Hot Sausage is up to you. You can even use a mixture of both.

Take it out of the casing and begin to cook it in a pan. Keep breaking it up as it cooks. You want a nice crumbled look to the meat. Smells sooooo good!!! The herbs and spices in Italian Sausage....there's nothing like it. I grew up in a mostly Italian home, so this is such a homey, comfort scent to me. Makes me feel like a real cook in my kitchen.


While that's browning up, slice up a Bell Pepper. Red. Green. No matter. Do half and half if you want. Throw that in the pan with the browning, crumbled Sausages.


Slice up an onion and add that to the pan.


Add some minced garlic. Toss and mix. Now all the flavors are starting to come together. Your kitchen should be smelling awesome.


When the meat is cooked through and the Peppers and Onions are cooked down and tender, transfer it to a bowl and keep warm. Leave any grease in the pan.

Here comes the part that's going to make you look like such a know it all in the kitchen. You are going to take the Polenta out of the fridge, turn the pan over carefully onto a board, and remove the Polenta. It should come out like a cake.


Then you are going to slice the Polenta into rectangles. Or squares. Or even use a round cookie cutter if you really want to get all fancy dancy. With a spatula, you are going to transfer your slices of Polenta (do a couple at a time) into the pan with the Sausage grease. You are now grilling your Polenta.


Do each side for a few minutes, then plate up. Two Polenta "cakes" topped with a couple of spoonfuls of that Sausage and Peppers mixture.

Oh. It. Is. So. GOOD!! The Polenta comes to life with savory flavorings of the Sausage and the sweet onions.


This is probably one of my favorite dishes that I've made in a long time. Such a great comfort food.